Setting up CloudFlare Free CDN for Website Caching and Security
Introduction
This multi-part tutorial is a complete guide to setting up WordPress on AWS. In this part of our tutorial we’ll be Setting up CloudFlare, a CDN that will let us distribute resources from our website around the world to improve the performance and reliability of the website. CloudFlare also prevent DDOS attacks and block many common types of hacks that could compromise your website
Links to other parts of our tutorial
- Part One, Introduction
- Part Two, Setting up AWS for WordPress with RDS, Nginx, HHVM, PHP, SSMTP
- Part Three, Migrating WordPress Sites Into AWS, including RDS Setup
- Part Four, Wordpress Website Optimization, Nginx Caching and DNS Changes to Go Live
- Part Five, Setting up HTTPS and HTTP/2 using Free Let’s Encrypt Certificates
- Part Six, Setting up CloudFlare free CDN for global caching
Page Table of Contents / Index
- CloudFlare Setup
- CloudFlare Pagerules
- Blocking Direct Access To Your Website
- CloudFlare WordPress Integration
Setting Up CloudFlare
CloudFlare is really very simple to get started with. Go to their website https://www.cloudflare.com/, register for an account, then follow their instructions on how to get your website set up. As part of this it will copy your DNS records from your current DNS server, with the IP address of your existing web server.
If this is a new domain it’s even easier – just set it up and enter your DNS records. You need:
- An A record that tells CloudFlare where to send requests for your content
- A CNAME record as an alias for the www subdomain
- You may need records for email : MX records to specify your mail host, plus optionally TXT records for Sender Policy Framework and DKIM. SPF and DKIM records are recommend if you want reliable email, where your emails arrive where it should and people can’t send spam saying it’s from your domain.
CloudFlare Pagerules for WordPress
Without any further changes CloudFlare will cache and deliver your images from it’s 100+ locations around the world, which is a significant speed-up for your website. With some further tweaks you can change the way the caching works to further improve performance, using Page rules. You get three page rules with the Cloudflare free plan, more on paid plans.
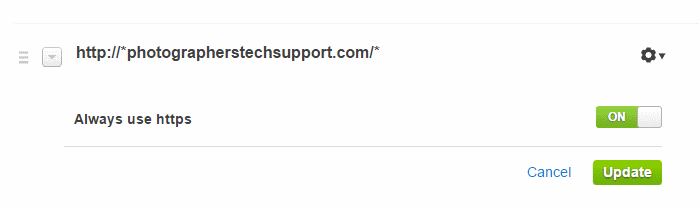
Make sure your “force https” rule is at the top. We’re going to prevent http access to the website later, so you’ll need this rule to run first to ensure all visitors are using https.
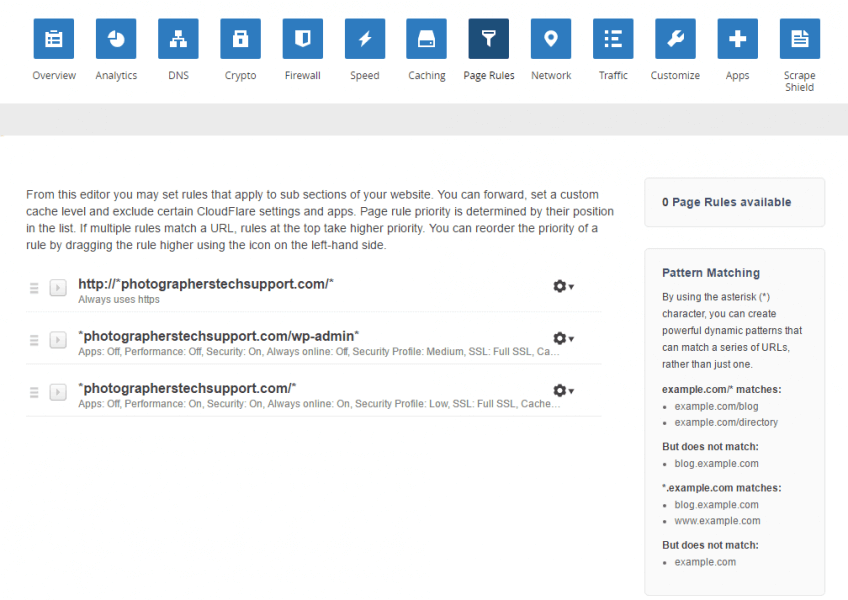
The first rule forces all your website visitors to HTTPS – this one is optional.
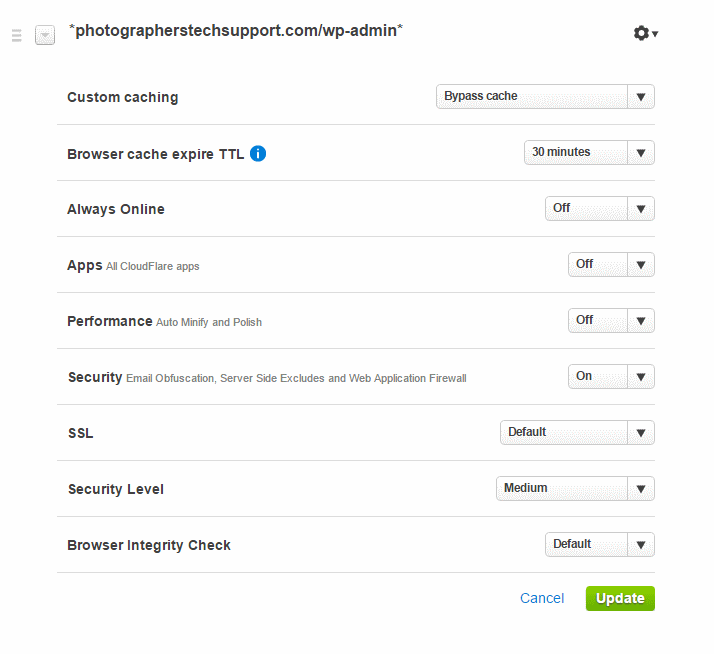
The second page rule tells CloudFlare not to cache anything inside the wp-admin folder, which prevents problems with administration.
This third page rule has two options standard caching, or cache everything. Cache everything tells CloudFlare to cache HTML files, the output of PHP. This is great for rarely changing websites, as your page is served from all around the world, reducing your server load – and preventing log entries. This is kept for as long as your page headers tell it to be kept – after that time it’s revalidated or fetched again.

Alternately you can have CloudFlare do standard caching, which doesn’t cache html. This is useful if you want records of your visitors in your web logs.

Under Crypto you can tell CloudFlare how you want SSL to work. Your options are:
- Off, for an http website (not recommended)
- Flexible, for https between the web browser and Cloudflare, and http from CloudFlare to your server. This is a great, low effort way to get https for a website, though it’s not compatible with very old web browsers.
- Full, for https between the web browser and Cloudflare, and http from CloudFlare to your server. This setting doesn’t do certificate verification, so you can use a self signed certificate, which we don’t need as we’re using Let’s Encrypt. It may slightly accelerate connections, but at the expense of not validating that your website is your website.
- Strict, for https between the web browser and Cloudflare, and http from CloudFlare to your server, fully validated.
We’ll use “full”, for now, but you should probably be using Strict.

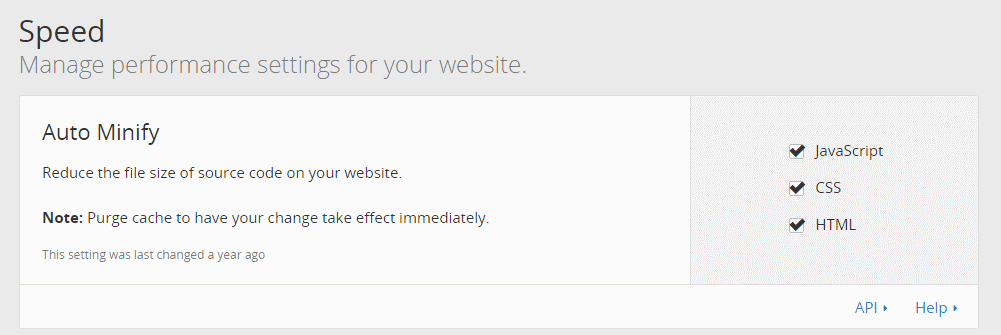
You can also have CloudFlare minify your resources, making them smaller which further reduces download time. Some WordPress themes like ProPhoto don’t work well with minification, so test it well before and after you enable this setting. It’s safe for most themes.
Blocking Direct Website Access to AWS Instances for CloudFlare
To prevent DDOS attacks and direct access to our web server we want to force all requests to go through CloudFlare for security and performance. Note that you shouldn’t do this for 24 hours after you set up CloudFlare, due to DNS propagation times.
AWS Security Groups are perfect for this. CloudFlare publish their public IP addresses so we can allow traffic only from these IPs. Follow the diagrams below to implement these blocks.
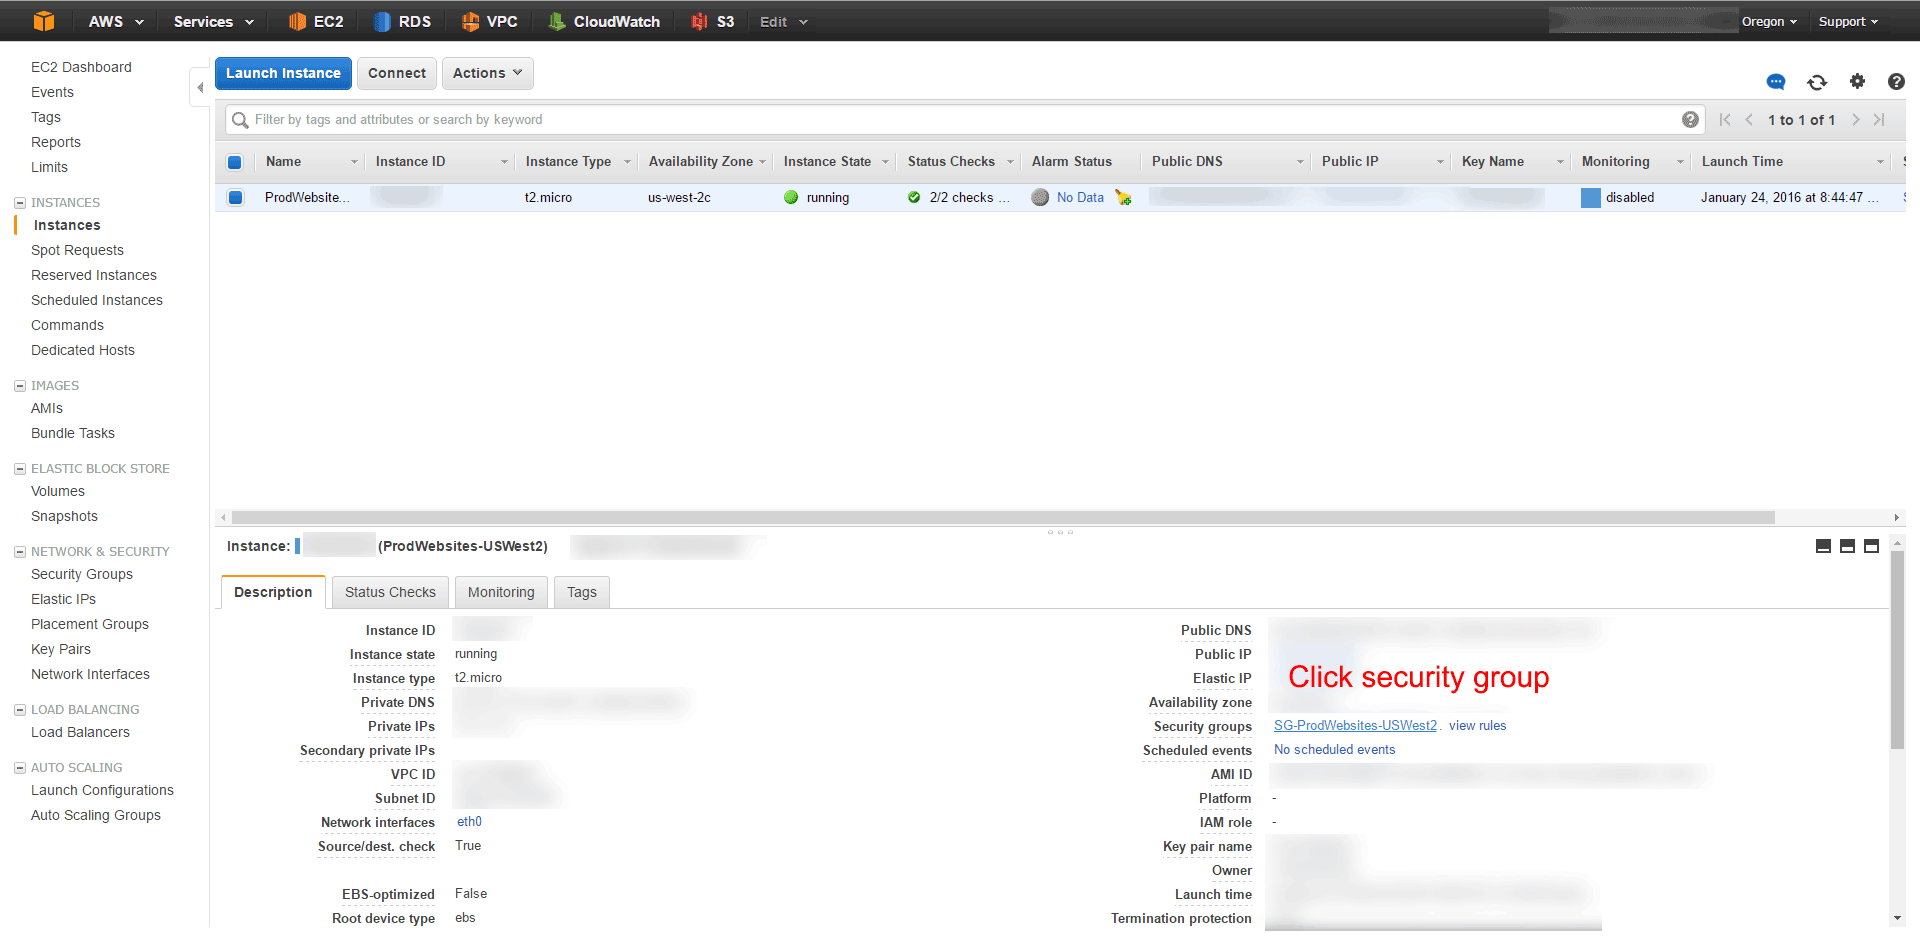
Go into your EC2 instance and click on the security group
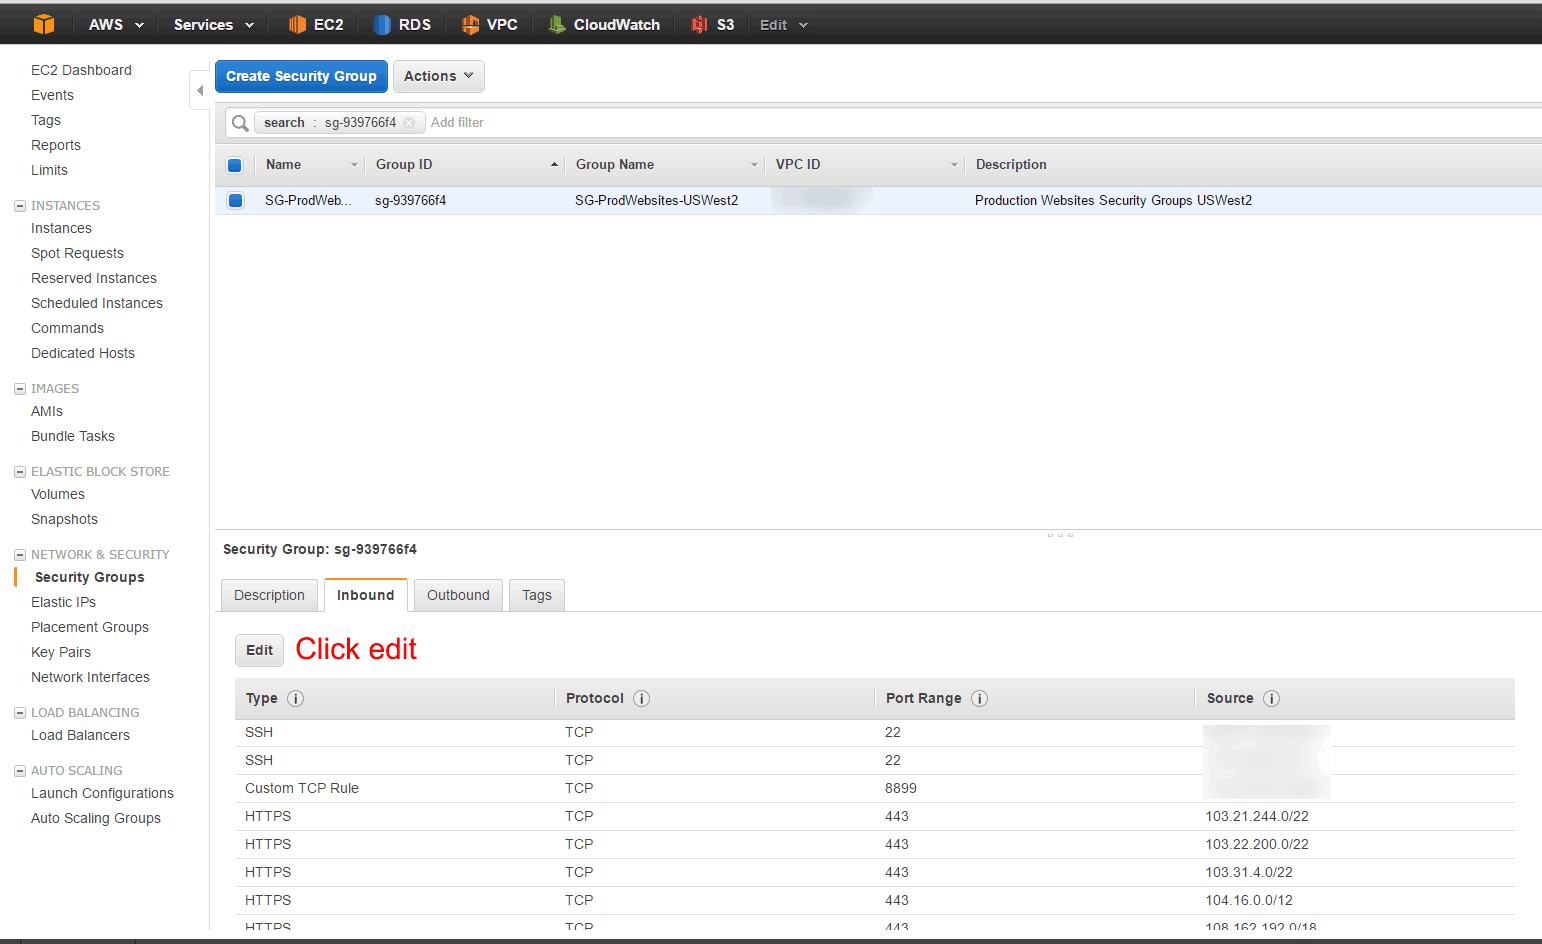
Go to the incoming tab and hit edit
Hit “add rule”, set the protocol as https (or http if you haven’t set up your https yet), and paste in the next CloudFlare IP v4 address. You may like to leave yourself direct access over http/https in case you want to change your hosts file to test something.
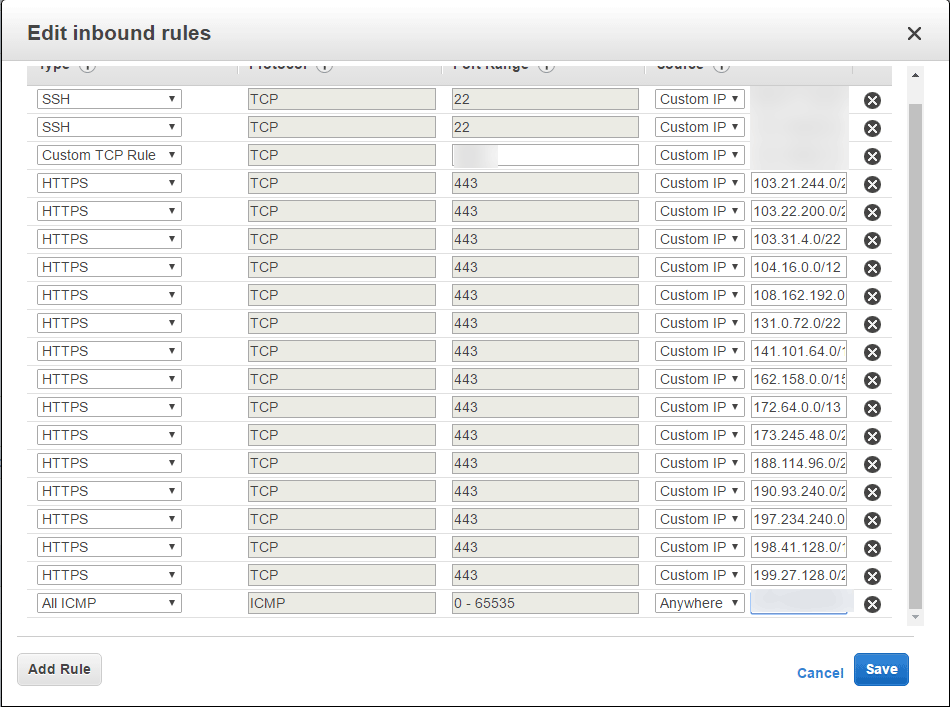
Make sure you remove any “0.0.0.0/0” entries for HTTP and HTTPS, otherwise the block won’t apply.
An interesting side effect of removing HTTP 0.0.0.0/0 is that the redirect from http to https stopped working. This was because of the order of page rules in CloudFlare – the rule to force HTTPS was below the rule for wp-admin. Perhaps adding all the CloudFlare addresses for HTTP would help with this, but it’s not necessary as CloudFlare will do it for us.
Setting up WordPress for CloudFlare
WordPress needs the “CloudFlare” plugin installed and configured. It’s pretty trivial so I won’t go into it here. If you end up with redirect loops add CloudFlare Flexible SSL WordPress Plugin, though if you’re using full SSL you won’t need this.
There’s not much to it really.
Setting up Nginx Real IP Module
With CloudFlare in place we’ll only get the IP addresses of CloudFlare in our logs, not our actual visitor IP addresses. To mitigate this we already built the Nginx Real IP module, now we add this to the start of the http section in our nginx.conf file. Some notes:
- It’s important to put it right after the start of the http block
- CloudFlare IPs change occasionally, get the latest list from their website – look for the links to text versions on that page.
- You can put this into an included file if you want to, to make maintenance slightly easier
 # CloudFlare - current as at 16 Feb 2016
 set_real_ip_from 103.21.244.0/22;
 set_real_ip_from 103.22.200.0/22;
 set_real_ip_from 103.31.4.0/22;
 set_real_ip_from 104.16.0.0/12;
 set_real_ip_from 108.162.192.0/18;
 set_real_ip_from 131.0.72.0/22;
 set_real_ip_from 141.101.64.0/18;
 set_real_ip_from 162.158.0.0/15;
 set_real_ip_from 172.64.0.0/13;
 set_real_ip_from 173.245.48.0/20;
 set_real_ip_from 188.114.96.0/20;
 set_real_ip_from 190.93.240.0/20;
 set_real_ip_from 197.234.240.0/22;
 set_real_ip_from 198.41.128.0/17;
 set_real_ip_from 199.27.128.0/21;
 set_real_ip_from 2400:cb00::/32;
 set_real_ip_from 2405:8100::/32;
 set_real_ip_from 2405:b500::/32;
 set_real_ip_from 2606:4700::/32;
 set_real_ip_from 2803:f800::/32;
 real_ip_header CF-Connecting-IP;
Conclusion and Troubleshooting
Forcing HTTPS can be a bit tricky, you can get into redirect loops. You can change your local hosts file to point directly at your origin server to check the server is still ok.
That’s really it for CloudFlare, it’s relatively simple.
The End
This is the end of our tutorial, if you’ve read from the beginning thanks for staying with us! We’ll update these tutorials if we make significant changes to our setup, and you can read more Amazon Web Services and Amazon Linux tips here.
If you have questions, suggestions, or corrections you can ask in the comments, and if you need professional help or support you can log a support request using the links above.