ProPhoto is a popular theme for photographers. It lets you create great looking websites relatively easily, and their support is absolutely top notch. ProPhoto 6 features responsive design, a big step forward in our opinion, as it allows more effective caching and optimisation.
Hit “read more” if you want some tips on how to optimise ProPhoto SEO and performance.
ProPhoto Performance
We’ve done a fair bit of performance and SEO optimisation for ProPhoto websites. One thing we regularly see from our testing tools is that the resized images ProPhoto generates are really large and not well compressed. Large images tend to be slow to download, and Google penalises slow websites, putting them further down their results pages.
Image Magik
ProPhoto supports ImageMagick for image resizing and compression. Not all web hosts support ImageMagik, and those that do sometimes require it to be activated on a per-directory basis. Talk to your support about this.
Activating ImageMagik – Click to see it larger
Once installed, Image Magik gives options around image compression that can be used at the same time as resizing. ProPhoto uses the default 85% compression, and unfortunately doesn’t let users select another level of compression. We can, however, do this manually.
Unfortunately people using the default “GD” image library appear to be out of luck. ProPhoto write the jpeg to disk themselves rather than using the GD imagejpeg function, which would allow the jpeg to be compressed. This could be because they cater for multiple image formats and didn’t want to write code for each format individually.
Adding ProPhoto 6 Image Compression
To make this change open the file ImagickImageModifier.php, and add the bold text where indicated, line 54 in our copy of the file. Note that you will have to make this change after each ProPhoto update, and it’s likely to be a little different for older versions of ProPhoto.
The full path to this file is likely to be /public_html/wp-content/themes/prophoto6/vendor/netrivet/prophoto-classes/src/ImageModifier/ImagickImageModifier.php
protected function downsizeImg() {
  $this->htmlComment();
  if ($this->isAnimatedGif && method_exists('Imagick', 'coalesceimages')) {
    $this->imagickImg = $this->imagickImg->coalesceimages();
    foreach($this->imagickImg as $layer) {
      $this->downsizeSuccess = $layer->resizeimage($this->modifiedWidth, $this->modifiedHeight, $this->filter, $this->sharpen);
      $layer->setimagepage($this->modifiedWidth, $this->modifiedHeight, 0, 0);
    }
    $this->imagickImg->deconstructimages();
  } else {
    # ProPhoto 6 Image compression by Photographers Tech Support - start
    $this->imagickImg->setImageCompressionQuality(65);
    # ProPhoto 6 Image compression by Photographers Tech Support - end
    $this->downsizeSuccess = $this->imagickImg->resizeimage($this->modifiedWidth, $this->modifiedHeight, $this->filter, $this->sharpen);
  }
}
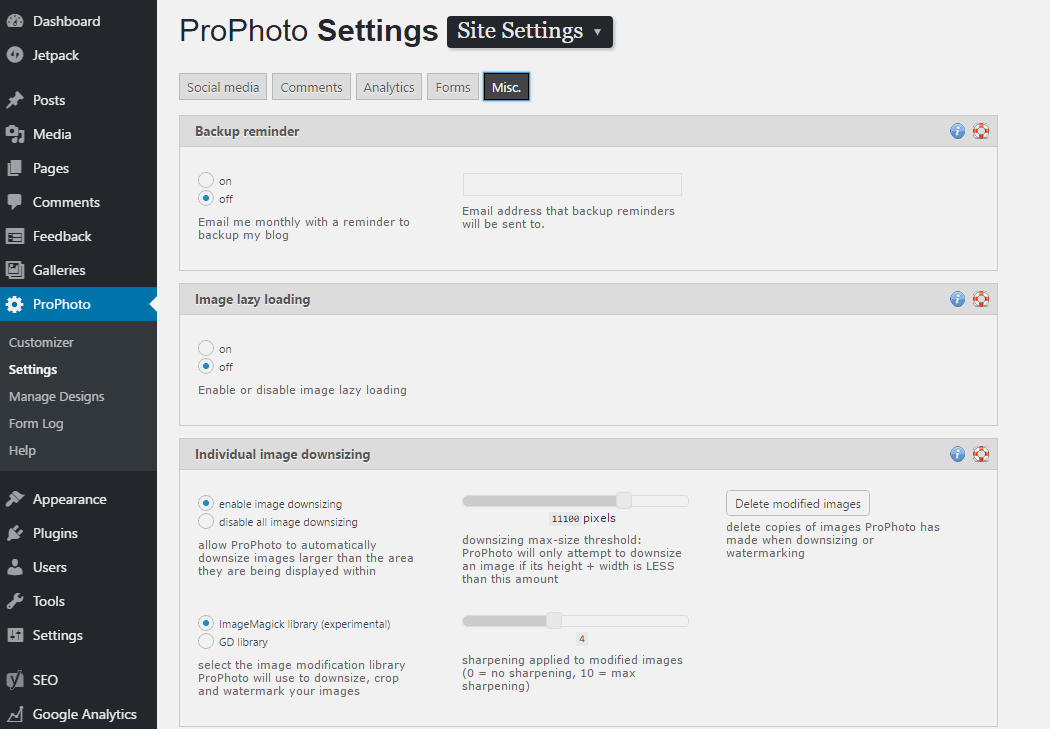
Deleting Old Thumbnails
Once you’ve put this code in place you’ll need to click the “delete modified images” button in the ProPhoto settings screen, as shown above.
Results
A quick spot check was done to check the image quality and the savings. At full size, 100%, the images looked fine, but if you blog them up to 200% the images didn’t look so good. Fortunately your website visitors should never see these images at any size other than the standard 100%.
One blog post with 20 images had around 4MB of ProPhoto generated resized images at the default compression level of 85, which reduced to 2.1MB at the 65% compression level. This significantly increased the PageSpeed and WebPageTest ratings for the website.