There are two main backup plugins we use for WordPress, UpdraftPlus and BackWPUp. Here’s how we configure them to back up WordPress blogs.
Backup
On most Wordpress blogs we use UpdraftPlus Backups to automate backups. Right now our favorite alternate BackWPup, a fairly powerful, flexible backup plugin. We like that it backs up everything, database and files, and that it compresses the files to save space on Dropbox. See below for screenshots of how to set this plugin up, as it’s a little more complex than most plugins. It has one drawback – it doesn’t like to create backups greater than 2GB, so you need to manually split out backup jobs for large sites – that’s not too difficult, but it is manual. It does however seem to create backups over 2GB, but it reports errors so it doesn’t give us a lot of confidence that it’s finished the job and done it properly.
We also tried WordPress Backup to Dropbox plugin but found that it was a straight copy of files rather than backing up a compressed file. It’s a good alternative if neither UpdraftPlus or Backwpup work.
Automatic Updates
Automatic updates of plugins and themes can be a double edged sword. On one hand you need to keep everything up to date to prevent people trying to take over your WordPress website, but on the other hand sometimes automatic updates can break a website. We think that the reward outweighs the risk, though we suggest mitigating this risk using one of the automatic backup plugins above.
On a regular host we just configure WordPress to do the updates itself, but that requires editing files you can’t easily edit when WordPress runs on Good Gallery. Instead we use the Advanced Automatic Updates plugin, which lets us choose what we want to update then automates the process.
Setting up UpdraftPlus Backup
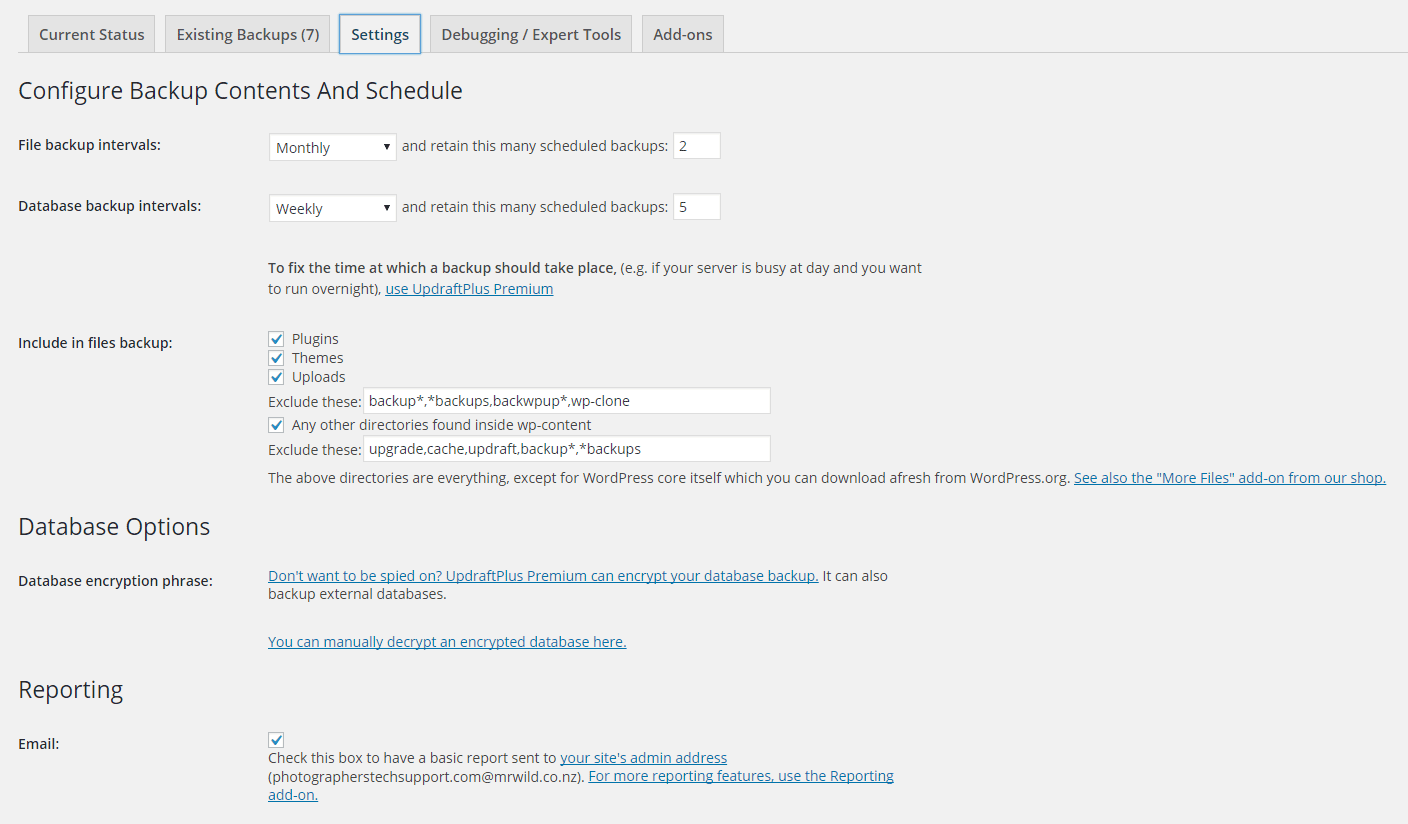
UpdraftPlus is fairly easy to set up. If you just want a basic backup to be made to your server use settings such as these.
(Click to enlarge)
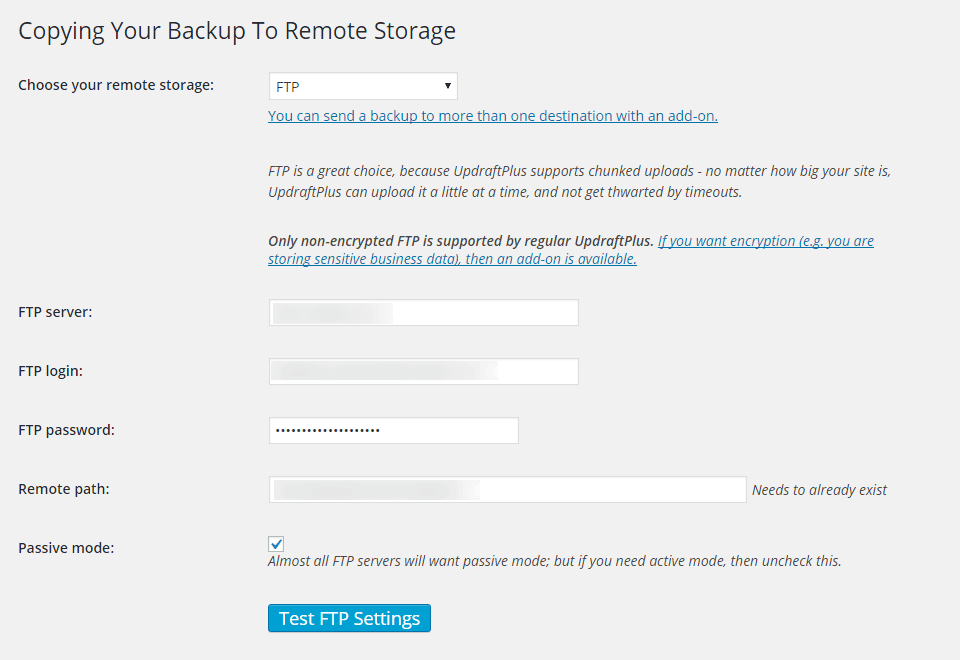
Setting up a remote backup is a good idea. The two best options are ftp and Dropbox. I tend to use ftp as it’s simple and reliable, and some hosts such as Good Gallery seem to have problems authenticating against a Dropbox account. You simply create an FTP account on your web server and plug the values into the settings screen. One key when using cpanel to set up FTP accounts is to take note of the username that your FTP setup gives you , as it often appends extra text after what you’ve selected.
(Click to enlarge)
Setting Up BackWPUp
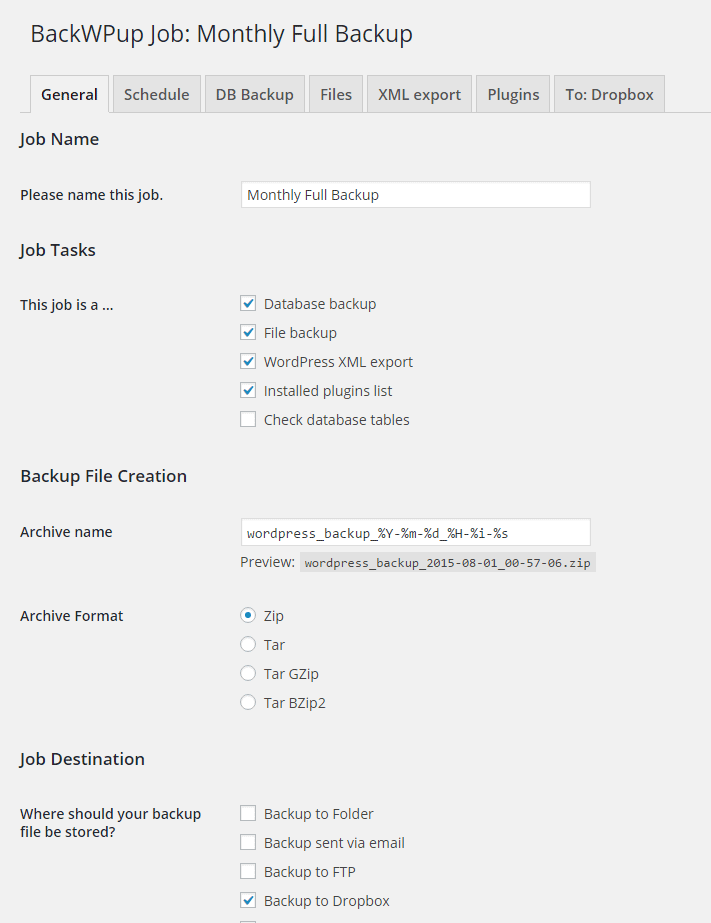
This plugin is slightly more complex than most. Follow along with our setup guide to set up monthly backups of the whole website, along with weekly backups of just your content.
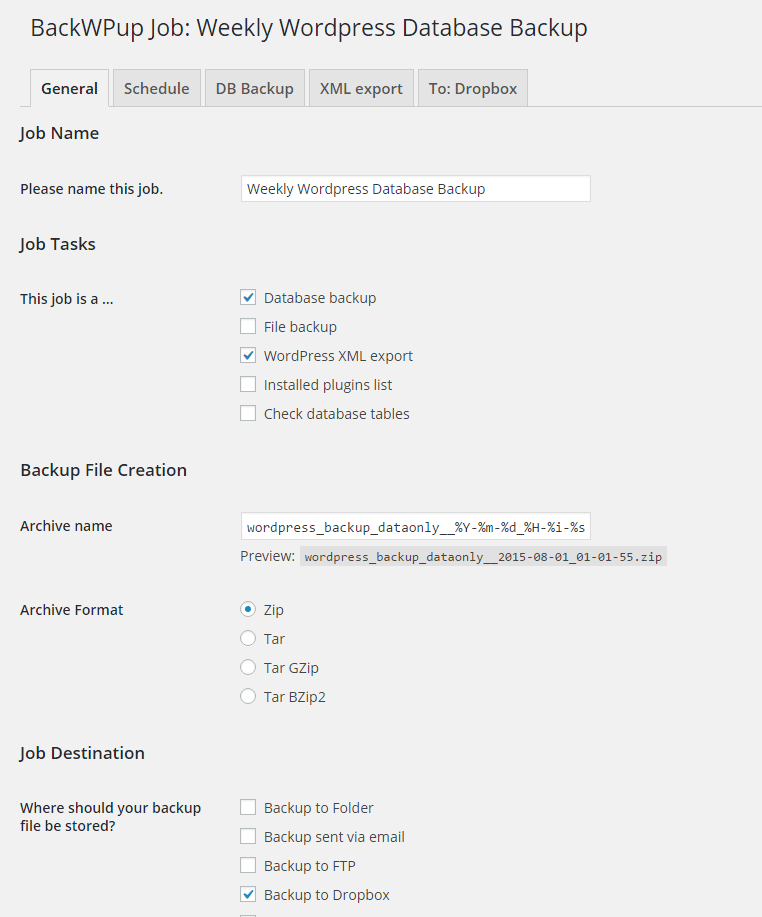
1. First choose “Add new job” from the BackWPup menu in WordPress. Make your screen look like ours. The keys are to check most of the checkboxes (except the last one, to choose “Zip” compression, and choose “Dropbox” as the destination.
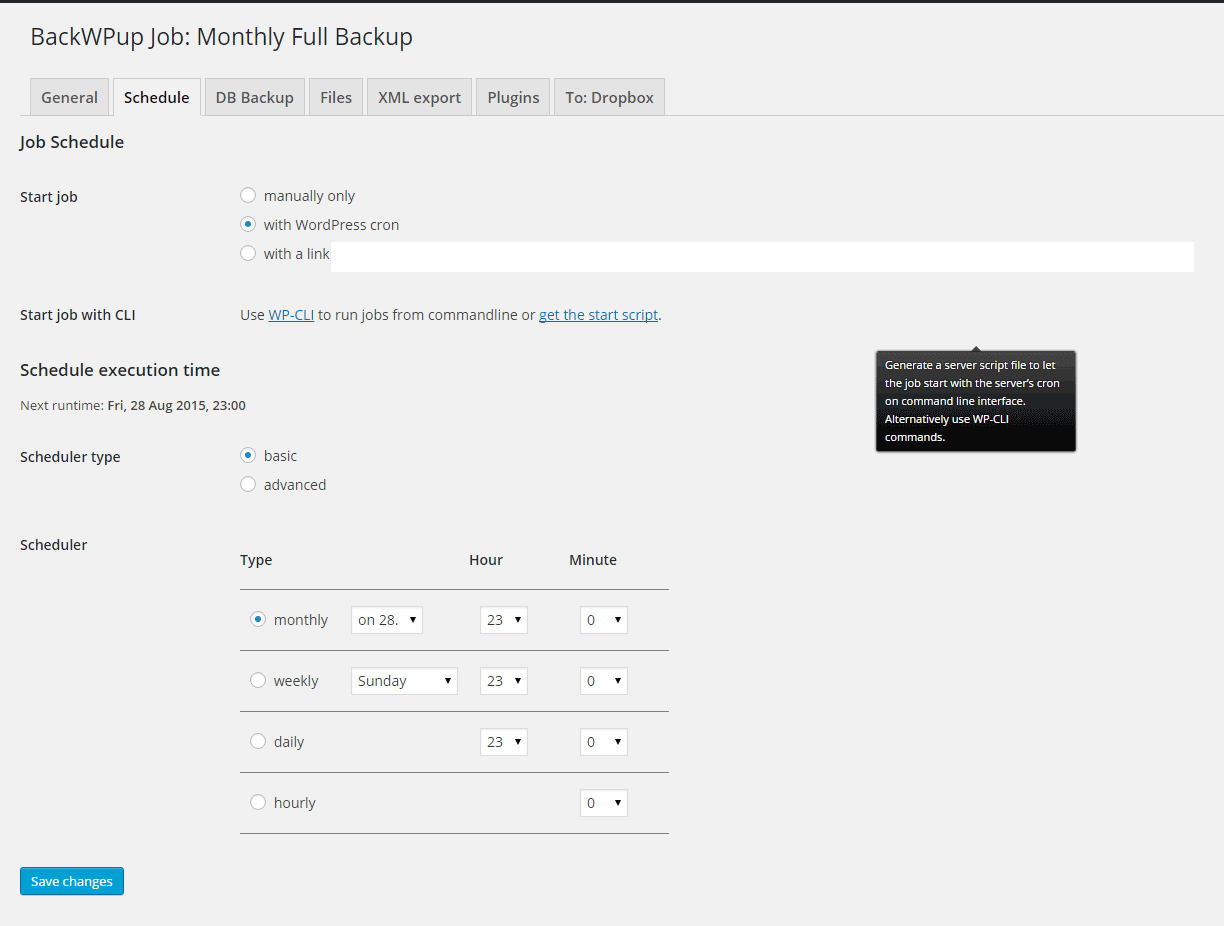
2. Set up your schedule to run the job once a month, using WordPress cron, at a time your website isn’t busy.
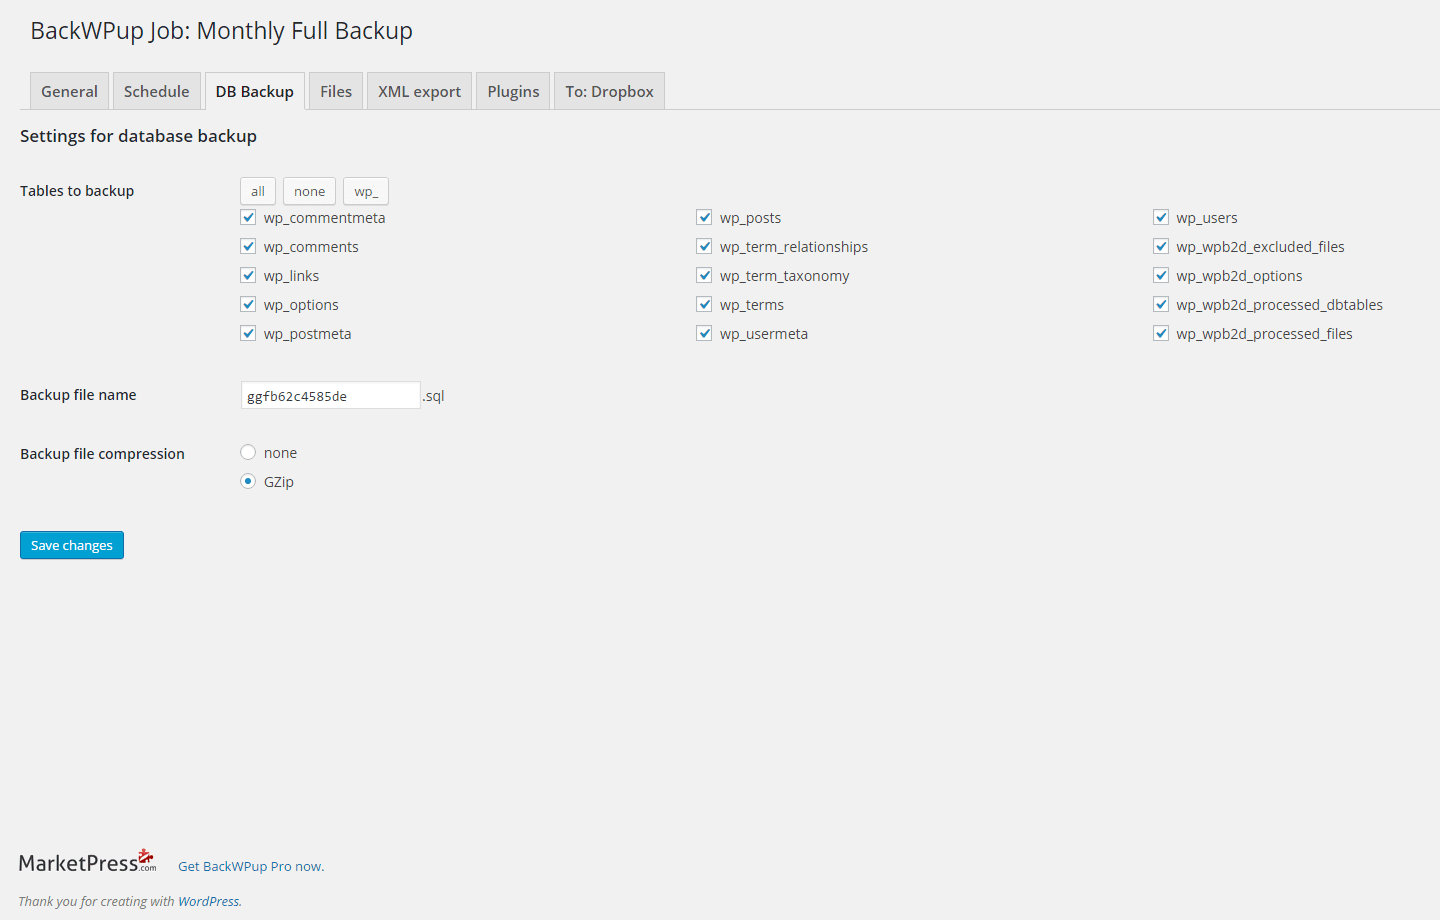
3. Set up the DB Backup as follows. The only change is to turn on GZip.
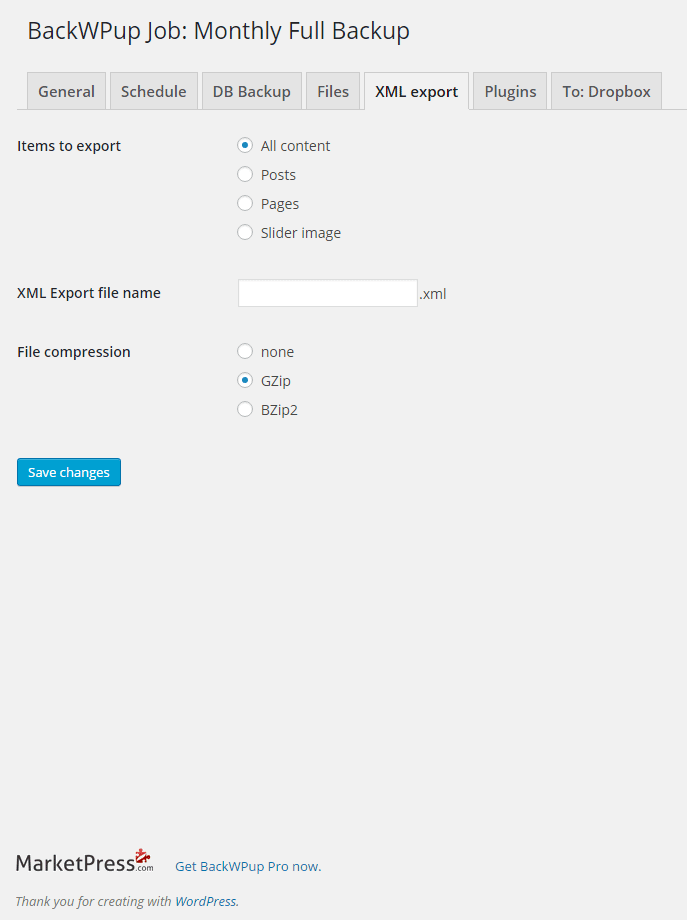
4. Next go to the XML Export tab – note that we left the Files tab at defaults other than to choose “do not back up thumbnails”, which isn’t critical.
Under XML Export choose “All content” and “Gzip”.
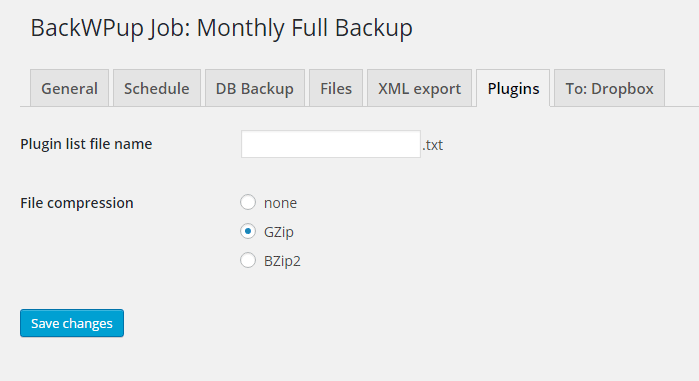
5. Under plugins choose “Gzip”.
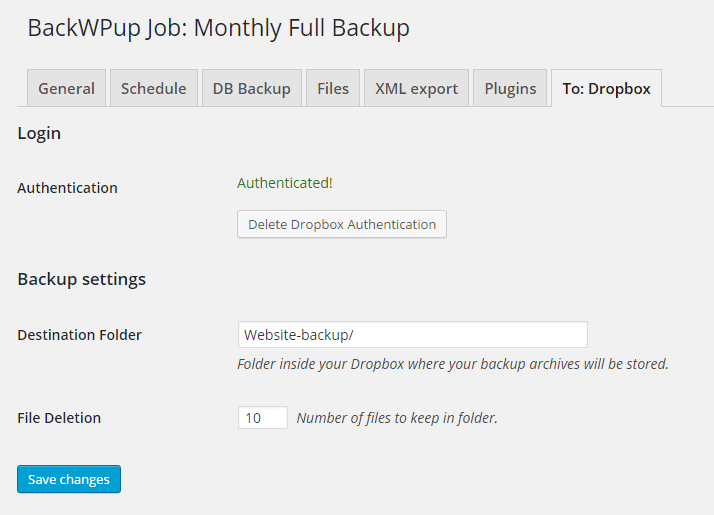
6. When you get to the “To: Dropbox” menu you’ll need to follow the instructions to authenticate with dropbox. This will open another window to grant permission, then you’ll copy and paste some text into the box on this page.
I recommend setting file deletion to anything between 2 and 10, otherwise it will quickly fill up your Dropbox. You can of course copy the backups from Dropbox to your PC then remove them from Dropbox.
7. As well as monthly full backups we also want to do weekly backups of your posts. This is faster and uses far less space than a full backup. Follow the procedure above, but in the general tab select “database backup” and “wordpress XML export”. This effectively gives you two backups in one.
If you have any questions ask in the comments below or get in touch using our contact form 🙂
