Introduction
A year ago I moved all my websites to AWS using the free tier, using an EC2 t2.micro and the RDS relational database service. Now that my year of free tier is up I’d like to reduce my costs. I want to migrate from RDS to MySQL on EC2.
My t2.micro runs Amazon Linux at around 1-2% CPU usage, probably because of the heavy caching and CDN I have in place. It has a few small spikes up to 20% when backups run, but CPU credits sits on maximum. I have plenty of headroom to move MySQL onto the server itself, eliminating the cost of RDS. There are downsides like no automatic backups and you lose some enterprise features, but I have my own backup scripts already and I can tolerate quite a lot of downtime. Amazon has a useful service called the Database Migration Service, which initially appeared ideal for this task (more on that later)
Moving MySQL from RDS to the EC2 instance using the AWS Database Migration Service is fairly straightforward, as described below. HOWEVER (and it is a very big however) the DMS doesn’t copy indexes or properties, so it actually makes a massive mess that takes a heck of a long time to clean up. So while it will work this way, I STRONGLY encourage people to use a different method for migration – I would do a dump using the mysql tool then import that into MySQL running on the EC2 instance.
Once I finished my EC2 install of MySQL I realised the default mysql-server package on AWS is MySQL 5.5. This lacks some features I need, such as “DEFAULT CURRENT_TIMESTAMP”, so I have to go through some pain to upgrade to MySQL 5.6. I looked at MySQL 5.7, and it’s quite easy to install using the official MySQL community repository, but I expect it would bring additional trouble and effort, so I didn’t bother with it for now.
Once this was all done I changed my EC2 instance from an t2.micro to an t2.nano, which reduces available CPU and RAM by half. This runs MySQL in a low memory configuration, PHP 5.6, and Nginx very well. It can use a full Xeon core as required, eating into CPU credits, so it’s as fast as the t2.micro – just not for as long. In terms of RAM it’s all used but of that 210MB is cached, which tells me that it’s really only using 293MB of RAM.
You can see how to upgrade from MySQL 5.5 to 5.6 on Amazon Linux below.
Installing MySQL 5.6 on Amazon Linux
I used the following commands to install MySQL on my EC2 instance
sudo su
yum install mysql56-server
To install the MySQL 5.7 from the official repository use these commands – note that I didn’t do this, I stuck with 5.6 as it does what I need and is in an amazon repo
sudo yum localinstall http://repo.mysql.com/mysql57-community-release-el6.rpm

yum list all | grep mysql

yum install mysql-community-server
Whichever version of MySQL you use, here’s what you do next to set up MySQL to run and set up admin users.
chkconfig mysqld on
service mysqld start
mysqladmin -u root password
mysqladmin -u root -p create [your_new_db]
Inside MySQL console
GRANT ALL PRIVILEGES ON *.* TO 'root'@'%' IDENTIFIED BY 'PASSWORD_GOES_HERE' WITH GRANT OPTION;
flush privileges;
Creating MySQL Users
mysql -h localhost -u root -p
CREATE USER '**USER'@'localhost' IDENTIFIED BY '**PASSWORD';
GRANT SELECT, INSERT, UPDATE, DELETE, CREATE ON **DATABASE.* TO 'USER'@'localhost' IDENTIFIED BY '**PASSWORD';
flush privileges;
If need to recreate users because you messed something up
delete from mysql.user where user='hr_user';
drop user hr_user@localhost;

flush privileges;
MySQL Settings and Configuration for Low RAM Systems
Note that it’s important if commands are in the mysqld or msqld_safe sections. This configuration goes into the file my.cnf
vi /etc/my.cnf
If you want to work out which configuration file MySQL is using you can use these commands
which mysqld/usr/sbin/mysqld --verbose --help | grep -A 1 "Default options"
The following changes need to be made
[mysqld]

# Disable performance schema to hugely reduce RAM usage
performance_schema = OFF

# I'm not sure if these two commands make any difference, but they don't seem to hurt
innodb_buffer_pool_size=30M
innodb_log_buffer_size=256K

[mysqld_safe]

# Settings to reduce RAM
innodb_buffer_pool_size=25M
innodb_log_buffer_size=256K
query_cache_size=10000
max_connections=30
key_buffer_size=80
innodb_ft_cache_size=1600000
innoinnodb_ft_total_cache_size=32000000
table_definition_cache=150

# Settings to reduce RAM: per thread or per operation settings
thread_stack=131072
sort_buffer_size=32K
read_buffer_size=8200
read_rnd_buffer_size=8200
max_heap_table_size=16K
tmp_table_size=50K
bulk_insert_buffer_size=100
join_buffer_size=128
net_buffer_length=1K
innodb_sort_buffer_size=64K

# Settings to reduce RAM: settings that relate to the binary log (if enabled)
binlog_cache_size=4K
binlog_stmt_cache_size=4K
After you’ve made these changes restart MySQL
service mysqld restart
Migrating from RDS to EC2 MySQL using mysqldump
This is the recommended method of migrating databases between servers.
Run this command to export the database contents.
mysqldump -u root -p -h RDS_HOST_NAME DATABASE_NAME> /tmp/databasename.sql
Run the following commands to log into MySQL, create a new database, and import the dump you created.
mysql -u root -p (followed by the password when prompted)create database mydb; use mydb; source /tmp/databasename.sql; GRANT SELECT, INSERT, UPDATE, DELETE, CREATE ON DATABASENAME.* TO 'USER'@'localhost' IDENTIFIED BY 'INSERT_PASSWORD';
That’s it. Quick and simple.
Migrating from RDS to EC2 MySQL using AWS Database Migration Service
Once again I need to say THIS IS A TERRIBLE WAY TO MIGRATE WORDPRESS. It doesn’t migrate secondary indexes, stored procedures, or auto_increment values, and fixing this took me about half a day on my installs. You can see how to fix WordPress auto_increment fields and indexes here.
The DMS creates a migration instance that does the actual migration for you. You need to ensure this instance is in a VPC and subnet that can access both the RDS instance and the EC2 instance. You can find more detail about this here.
Start the database migration service, which for me is at this URL and step through the first obvious screen.
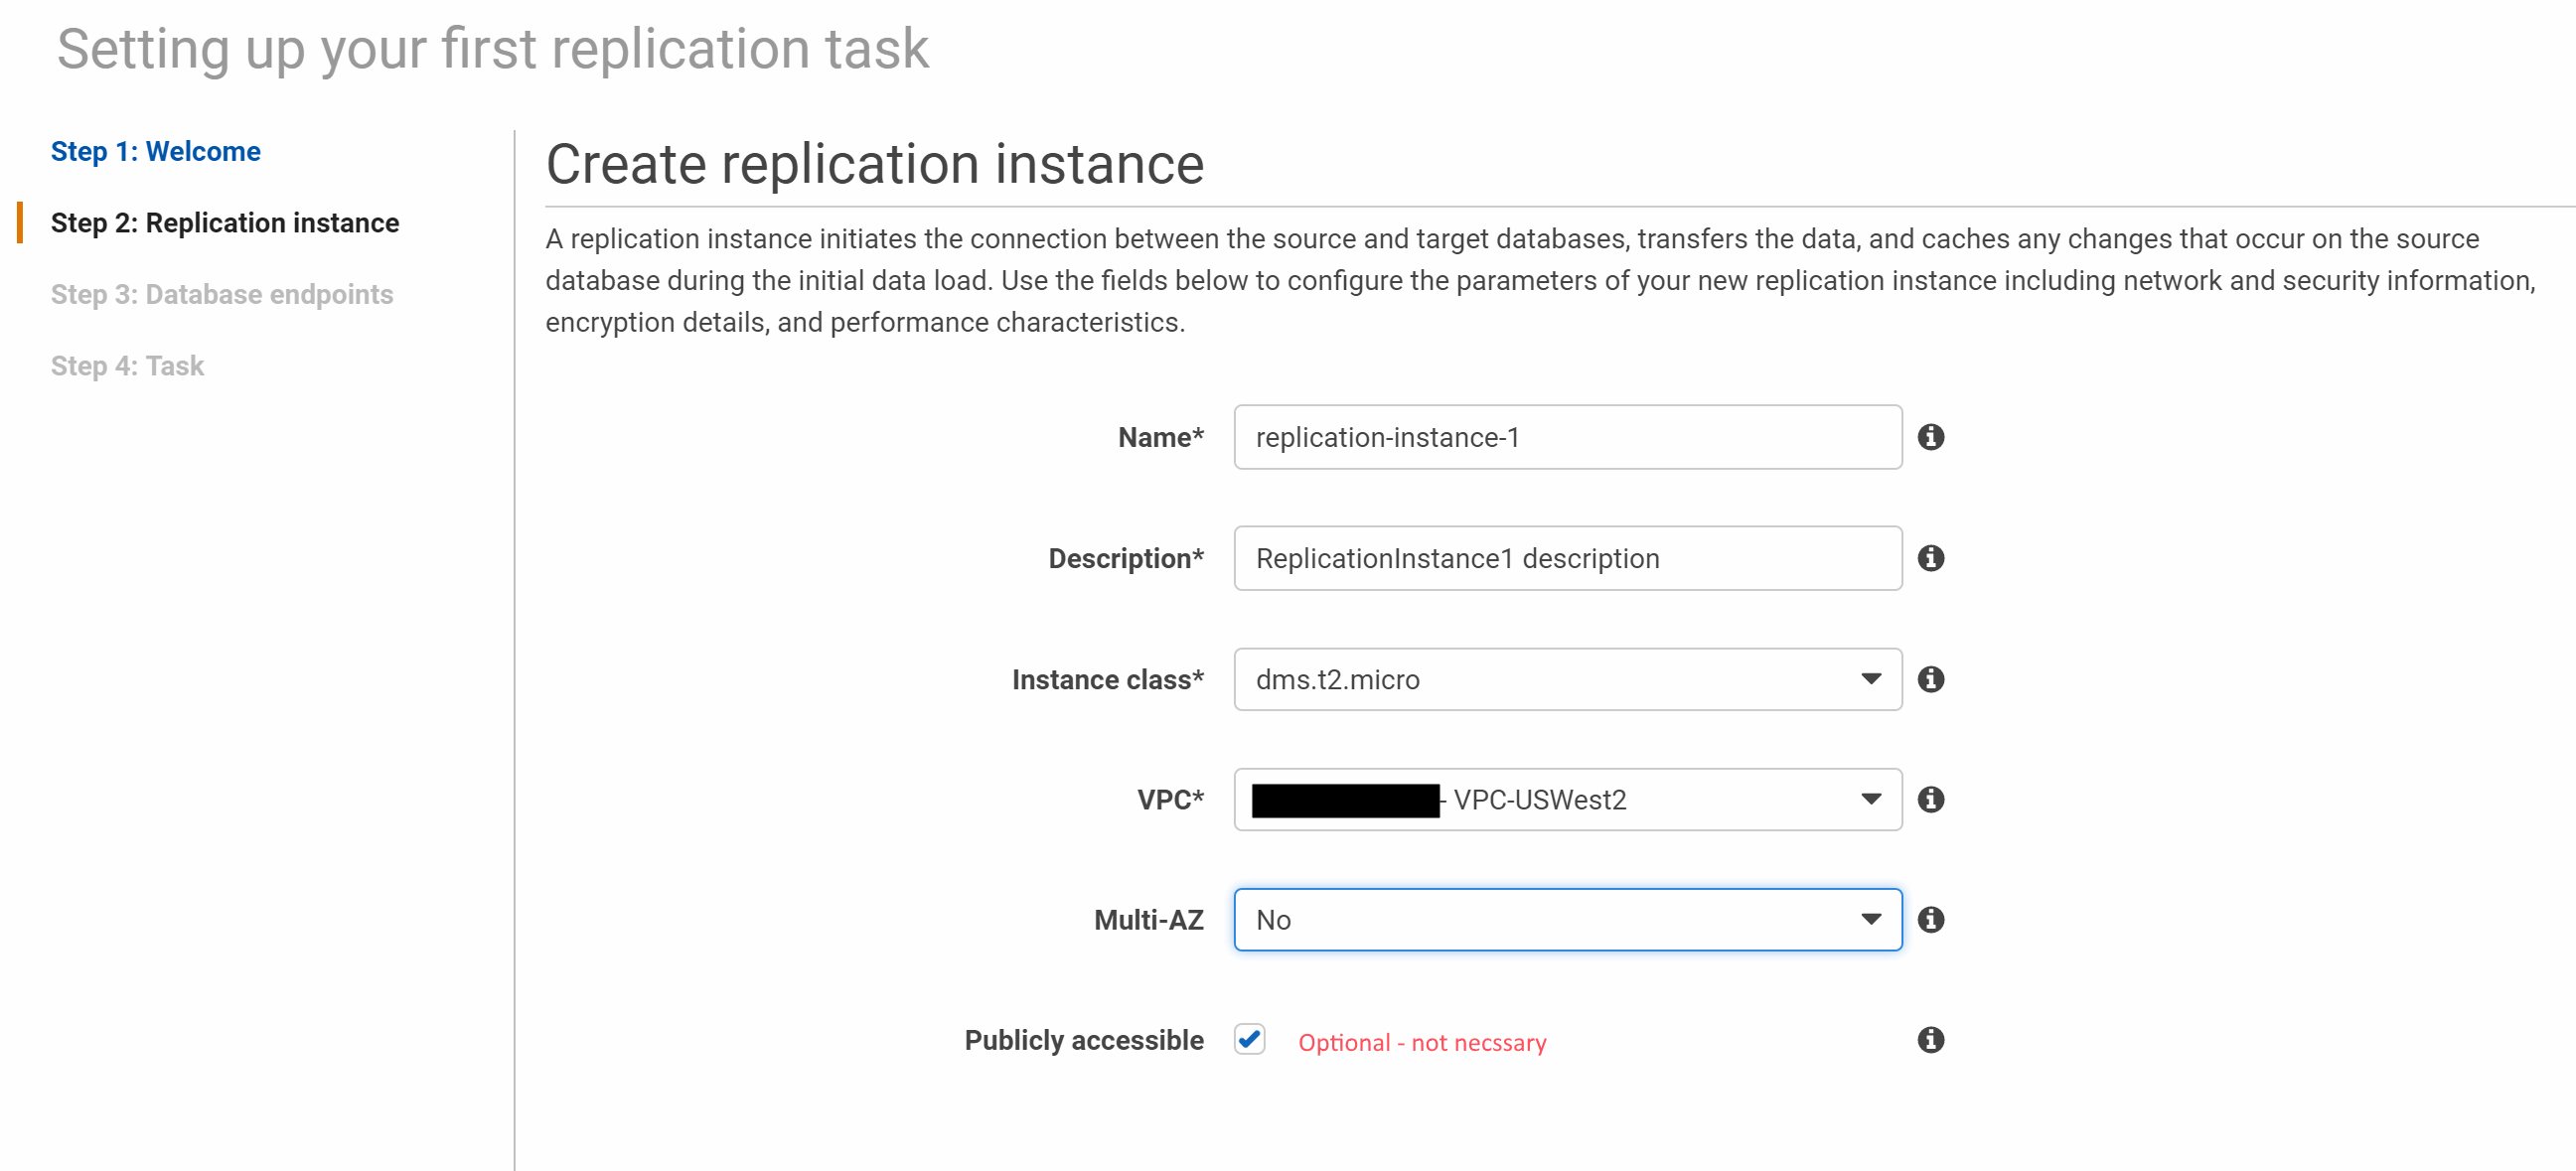
Create the replication instance – I used a t2.micro as I have small databases.

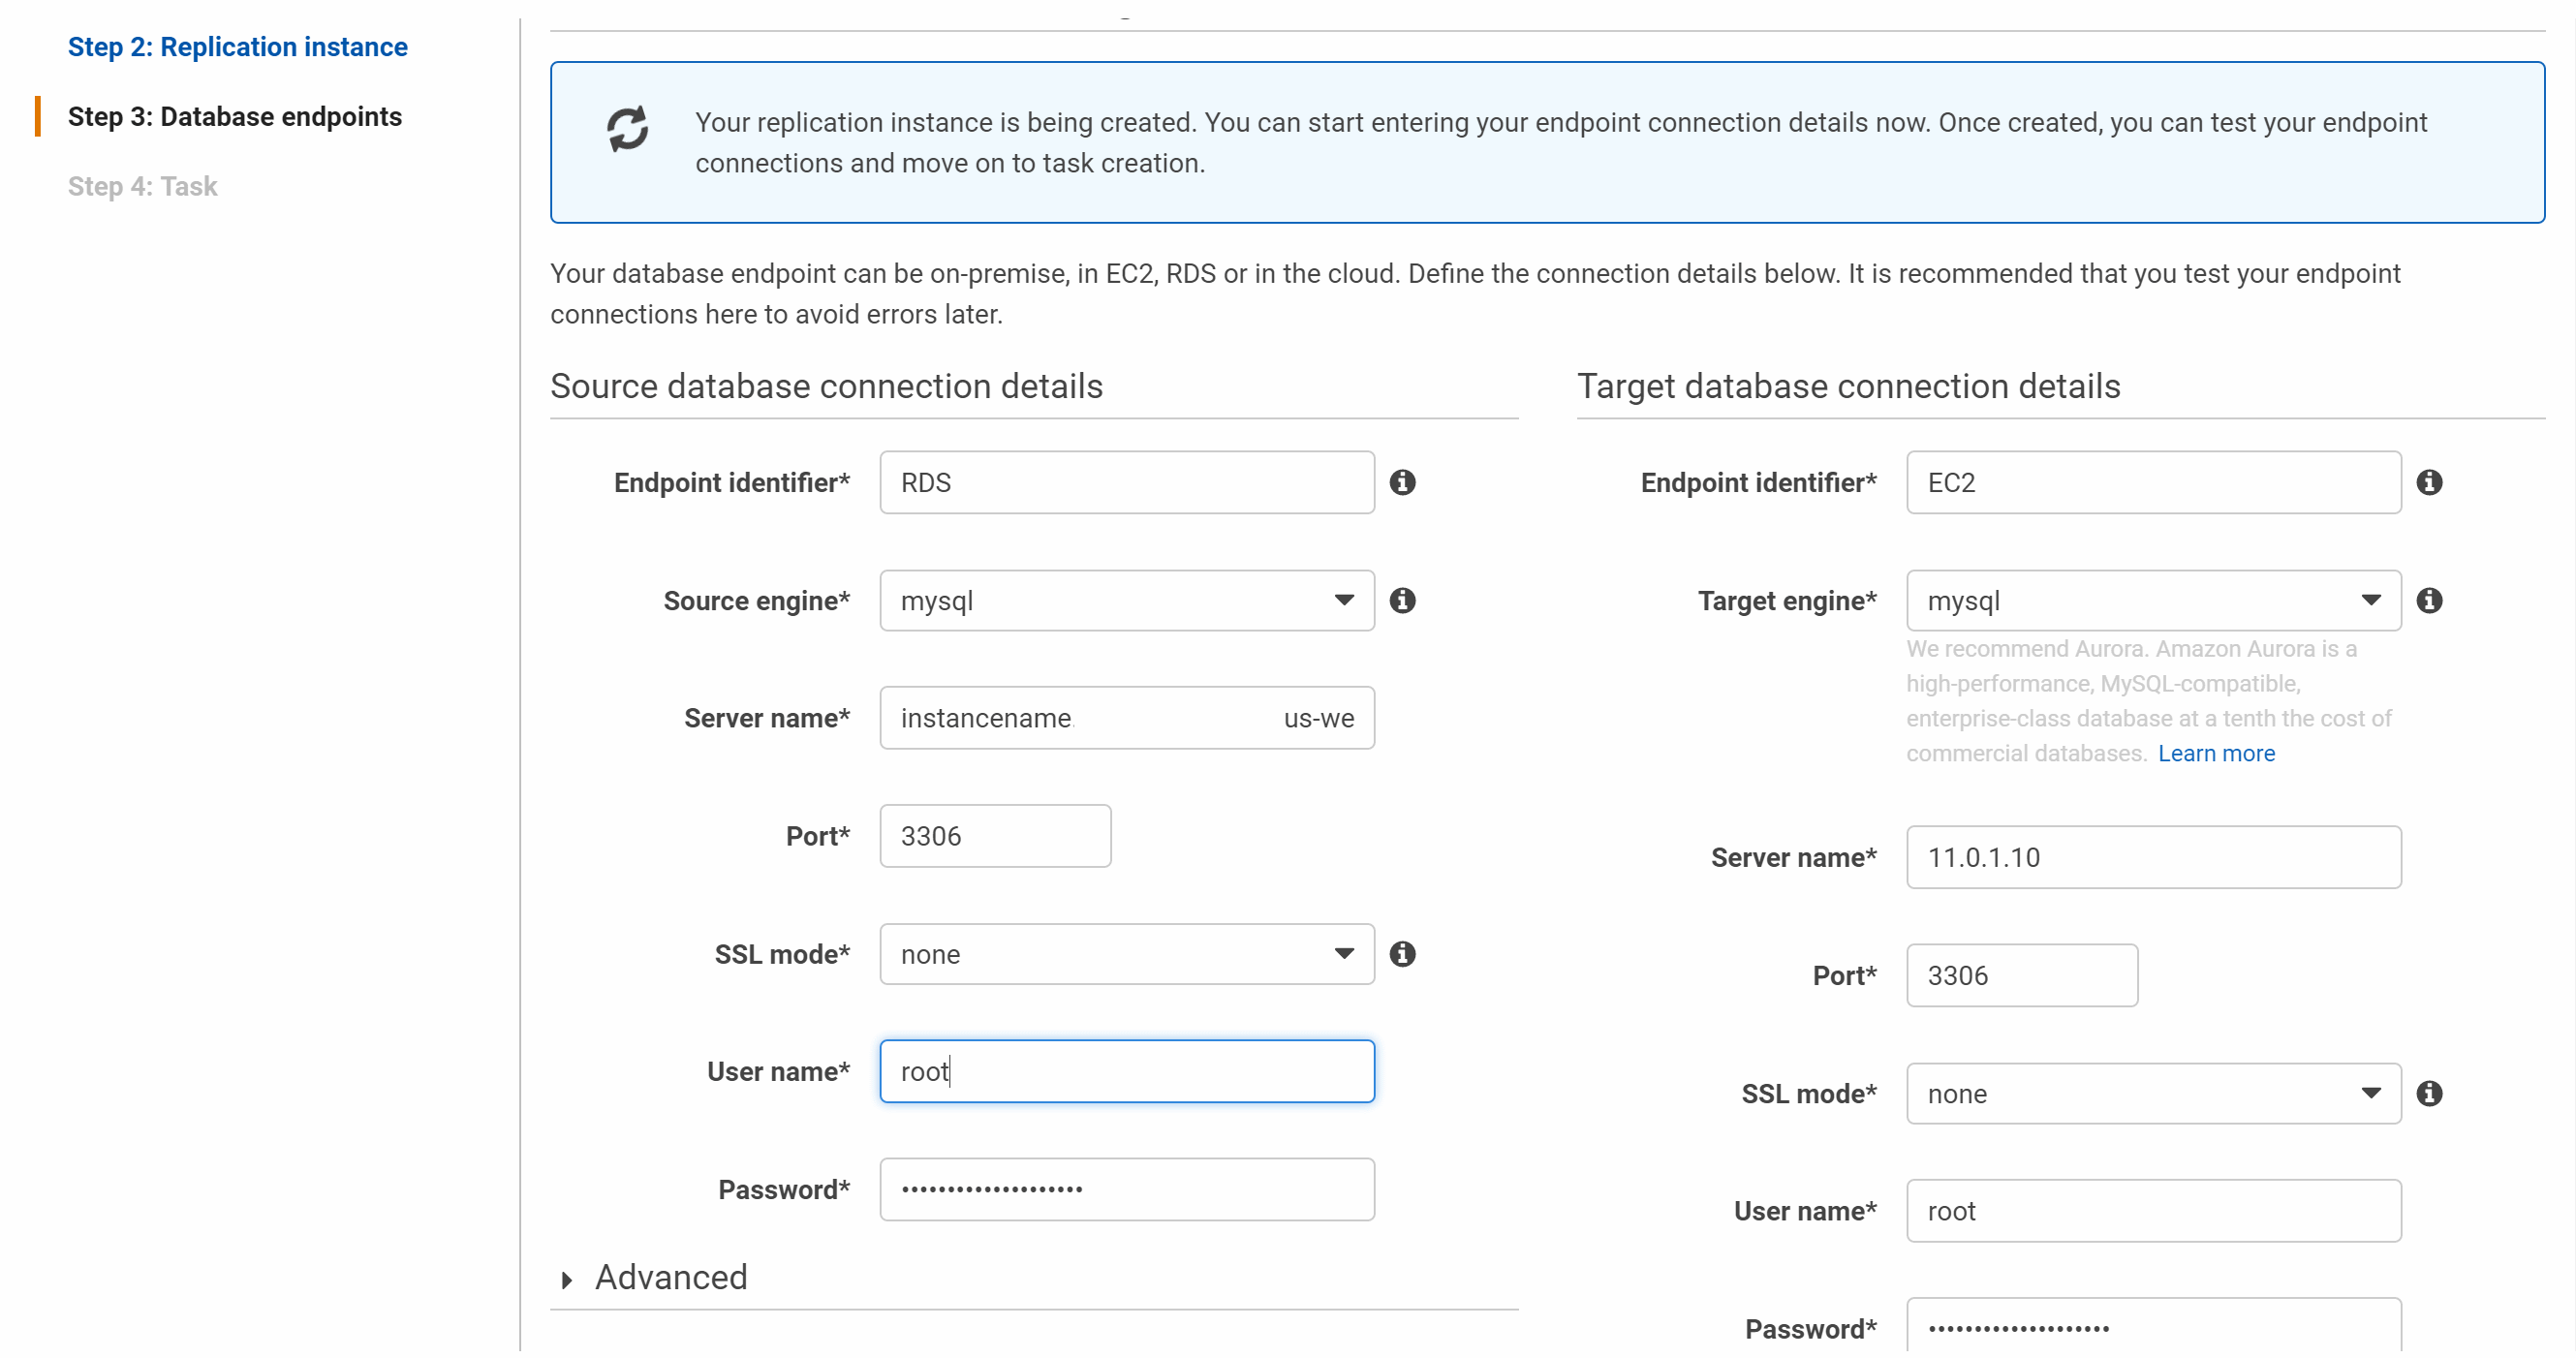
Configure the migration. Make sure you hit the test buttons to ensure connectivity

Set up what you want migrated. Unfortunately at this point when I was trying to create screenshots I hit the wrong button and the DMS wizard exited, so I don’t have a screenshot here. It’s fairly simpleto configure, but note that you have to manually start the migration once it’s setup.
All in all I found the DMS very easy to configure and run, but sadly lacking in areas that only became obvious once the migration was complete and RDS was turned off. Better testing would’ve uncovered these issues earlier. Of course I have an RDS snapshot but since the data has changed it’s too late to do this again. I could dump the database schema then import data manually, and that’s what I’ll probably do at some point.
Important note: make sure after you’re done that you delete your tasks, endpoints, and replication instances to avoid additional costs. You’ll also want to close any security group or NACL ports you opened for the migration.
Upgrading from MySql 5.5 to MySql 5.6 on Amazon Linux
The following are the commands I used to upgrade from MySQL 5.5 to MySQL 5.6 on my EC2 amazon linux instance.
sudo su
yum list installed | grep mysql
service mysqld stop
yum remove mysql mysql-config mysql-server mysql55-libs mysql55-server
yum install mysql56-server
vi /etc/my.cnf
(Update the my.cnf as per the settings above – this is important or the server won’t start if you don’t have enough RAM)
service mysqld start
mysql_upgrade -u root -p
mysql -h localhost -u root -p    (then enter your password)
show databases;    (this shows that your databases still exist)
service php-fpm-5.6 restart
service nginx restart
References